Blog Archives
Getting started with Chef on Microsoft Azure
You can find an initial set of blog posts to help you get started with Chef on Microsoft Azure here. If you are new to Chef, I recommend you to go through some of the Chef tutorials https://learn.chef.io/. Objective of these posts are not to go deep into Chef, but to help you setup your whole set of machines (Chef Workstation, Chef Server, Chef Node) on Microsoft Azure.
https://manesh.me/2015/10/17/setup-chef-workstation-on-microsoft-azure/
- Create a virtual machine for workstation
- Install Chef Development Kit
- Learn Chef Basics on Ubuntu
https://manesh.me/2015/10/19/setup-chef-server-on-microsoft-azure/
- Create Virtual Machine
- Set DNS Name Label for virtual machine
- Configure Chef Server
- Create Organization
- Establish Connectivity from Workstation
https://manesh.me/2015/10/20/setup-chef-node-on-microsoft-azure/
- Install Azure CLI & Login
- Create Virtual Machine for Node
- Bootstrap & Verify Node
https://manesh.me/2015/10/23/writing-cookbook-on-microsoft-azure/
- Create cookbook on workstation
- Upload cookbook to server
- Add cookbook to run list of node
- Run chef-client on node
- Enable endpoint using Azure CLI
In the next set of blogs, I will walk you through in detail on various Azure Knife commands as well as using Chef along with Azure Resource Manger templates.
If you have feedback or questions, write a comment for the blog.
Writing cookbook on Microsoft Azure
This is the fourth post in the Chef and Microsoft Azure blog series. You can read the previous ones at:
- https://manesh.me/2015/10/17/setup-chef-workstation-on-microsoft-azure/
- https://manesh.me/2015/10/19/setup-chef-server-on-microsoft-azure/
- https://manesh.me/2015/10/20/setup-chef-node-on-microsoft-azure/
Writing cookbook is similar to how you would write it on other infrastructure. To get started with cookbook on Azure, I am exploring a cookbook to setup apache web server and show home page. Also, this will show you how to upload cookbook to the Chef Server, and set the run list for Chef Node via knife. This blog focus on getting your first cookbook on Azure. This do not go into details of cookbook components, if you would like to learn more about that refer https://docs.chef.io/cookbooks.html and https://learn.chef.io/manage-a-web-app/ubuntu/
Prerequisites
- Microsoft Azure Subscription
- Have gone through previous three posts in the series
Setup Sequence
- Create cookbook on workstation
- Upload cookbook to server
- Add cookbook to run list of node
- Run chef-client on node
- Enable endpoint using Azure CLI
Create cookbook on Workstation
Execute the following commands from the workstation.
# move to home directory
cd
# move to chef-repo directory in home
cd chef-repo
# create new cookbook named webserver
knife cookbook create webserver
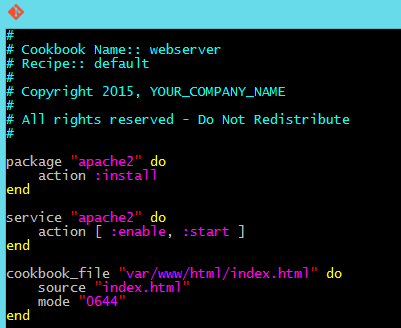
Edit the default recipe for webserver and update content of the file to following. vim editor comes default in the instance, so you could use that. To start inserting text in vim, press the ‘i’ key to enter insert mode. When you have finished editing, press ESC to exit insert mode, then type ‘:wq’ to save and exit the editor.
# edit the default recipe
vim cookbooks/webserver/recipes/default.rb
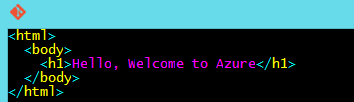
Add index.html file to cookbook’s files/default directory and edit the content.
edit the default index file
vim cookbooks/webserver/files/default/index.html
Upload cookbook to Server
Execute the following commands from the workstation.
# move to home directory
cd
# move to chef-repo directory in home
cd chef-repo
# upload the cookbook to Chef Server
knife cookbook upload webserver
Add cookbook to run list of node
Execute the following commands from the workstation.
# move to home directory
cd
# move to chef-repo directory in home
cd chef-repo
# Add cookbook to the run list of node
knife node run_list add mme-chef-node1 “recipe[webserver]”
Run chef-client on node
Execute the following commands from the Chef Node.
# running chef-client on mme-chef-node1
sudo chef-client
# Ensure that webserver is available on port 80
curl http://localhost/
We have created and executed our first runbook on Azure now. You can learn more about cookbooks from http://learn.chef.io/
Enable endpoint using Azure CLI
We have tested and ensured that web server is running and default index file is returned correctly. However, if you try out http://mme-chef-node1.cloudapp.net/ , the public endpoint 80 of the webserver, you will not get any contents. This is because we only have port 22 in the endpoints of Azure VM. To enable port 80 using Azure CLI, follow the below commands from workstation node.
Login to Azure CLI using your preferred option (Microsoft Account, Organizational Account or Service Principal), following the blog https://manesh.me/2015/10/15/options-for-azure-cli-logins-step-by-step-guidance/
Once you are logged into Azure CLI, execute the following command to check the current details of the virtual machine. Check endpoint information from the result.
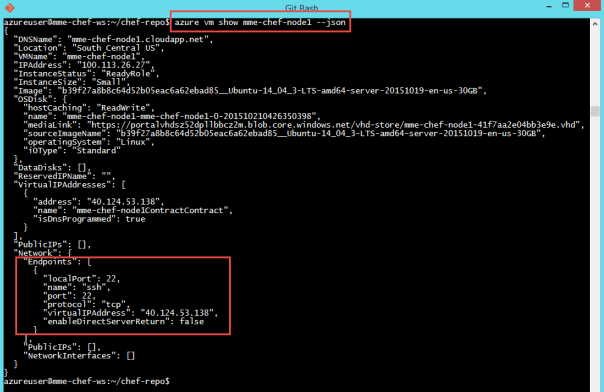
Create new endpoint on port 80. Keep both public port and private port to be 80.

Now we can browse to http://mme-chef-node1.cloudapp.net/ and see that index page is available.
Next Blog
With this blog, we have gone through the basics of working with Chef on Microsoft Azure. In the next series of blogs, I will dive deep into using Azure specific knife commands and using Chef along with Azure Resource Manager templates.
Setup Chef Node on Microsoft Azure
This is the third post in the Chef and Microsoft Azure blog series. You can read the previous ones at:
- https://manesh.me/2015/10/17/setup-chef-workstation-on-microsoft-azure/
- https://manesh.me/2015/10/19/setup-chef-server-on-microsoft-azure/
These blog posts will help you to learn Chef, by going through all the tutorials provided by Chef – https://learn.chef.io/tutorials/ – from Microsoft Azure. In the previous posts, we have gone through the setup of a workstation as well as server. In this post, I am exploring the tutorial https://learn.chef.io/manage-a-node/ubuntu/bootstrap-your-node/
One feedback I received is to automate using script as much as possible, than going through the web user interface. I will try to use scripts to the maximum extent possible.
Prerequisites
- Microsoft Azure Subscription
- Have gone through previous two posts in this series
Setup Sequence
- Install Azure CLI & Login
- Create Virtual Machine for Node
- Bootstrap & Verify Node
Install Azure CLI and Login
Let us make sure that we have Azure CLI on the workstation server. Execute the following commands from the workstation (We have an Ubuntu 14.04 image for the workstation).
| # https://azure.microsoft.com/en-us/documentation/articles/xplat-cli-install/#install-and-use-nodejs-and-npm
sudo apt-get install nodejs-legacy sudo apt-get install npm sudo npm install -g azure-cli |
Login to Azure service from CLI. I have written a detailed step by step guidance for the same at https://manesh.me/2015/10/15/options-for-azure-cli-logins-step-by-step-guidance/. If you are looking for complete automation without any user interaction, check out the login option using service principal.
| # https://manesh.me/2015/10/15/options-for-azure-cli-logins-step-by-step-guidance/
azure –version azure login |
Create Virtual Machine for Node
Next, let us create a new virtual machine to act as the Chef Node. We are executing following commands from the workstation.
| # list all azure vm images for Ubuntu 14.04
azure vm image list | grep -i Ubuntu-14_04 # Note that latest image is coming at the end in the list # Note that image name is second item in the item row # Get the latest (last) image from the list imagename=`azure vm image list | grep -i Ubuntu-14_04 |tail -1 | awk ‘{print $2}’` # Learn about azure vm create options azure help vm create # Create a new vm for Chef Node # vm create [options] <dns-name> <image> [userName] [password] # SSH port 22 is enabled in endpoints as we use option -e azure vm create -e -z Small -l “South Central US” mme-chef-node1 $imagename azureuser Demo@Pass1 # Wait for couple of minutes and ensure that Status of vm created is ReadyRole azure vm list |
Bootstrap and Verify Node
From the workstation, execute the bootstrap command remotely to bootstrap the node.
| # ensure you are executing these from chef-repo directory
cd cd chef-repo # test connection to server, we should see contoso-validator knife client list # knife bootstrap ADDRESS -x USER -P PASSWORD –sudo –use-sudo-password –node-name NAME knife bootstrap mme-chef-node1.cloudapp.net -x azureuser -P Demo@Pass1 –sudo –use-sudo-password –node-name mme-chef-node1 # verify that node is successfully bootstrapped knife node list |
Also, you can see the node listed in the Chef Management Portal.

Next Blog
Next, I will try out authoring some basic cookbooks and applying that policy to the node.
Setup Chef Server on Microsoft Azure
This is the second post in the Chef and Microsoft Azure blog series. You can read the first blog in this series at https://manesh.me/2015/10/17/setup-chef-workstation-on-microsoft-azure/
In this blog, I am exploring how to setup a Chef Server on Microsoft Azure. For most part, I followed the steps suggested in https://docs.chef.io/azure_portal.html
Prerequisites
- Microsoft Azure Subscription
Setup Sequence
- Create Virtual Machine
- Set DNS Name Label for virtual machine
- Configure Chef Server
- Create Organization
- Establish Connectivity from Workstation
Create Virtual Machine
Navigate to https://portal.azure.com and login using your credentials.
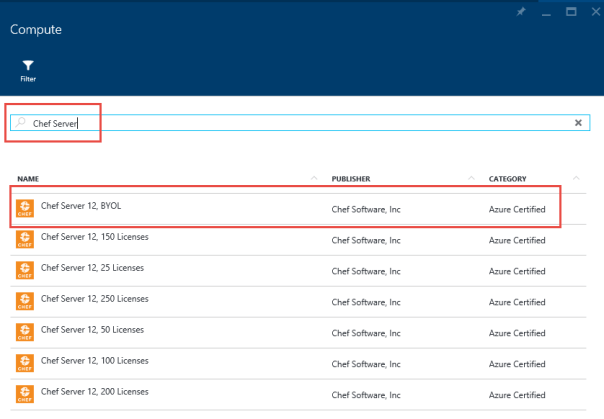
Click New, then Compute, then Marketplace
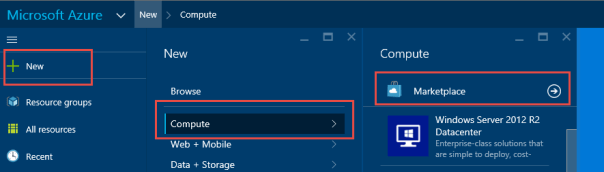
Search for Chef Server, then select Chef Server 12, BYOL.
Note: Chef provides a fully functional Chef server that can be launched from the Azure Marketplace. This server is preconfigured with Chef Server, the Chef Management console, Chef reporting, and Chef Analytics. This configuration is free to use for deployments under 25 nodes, and can be licensed for deployments beyond 25 nodes.
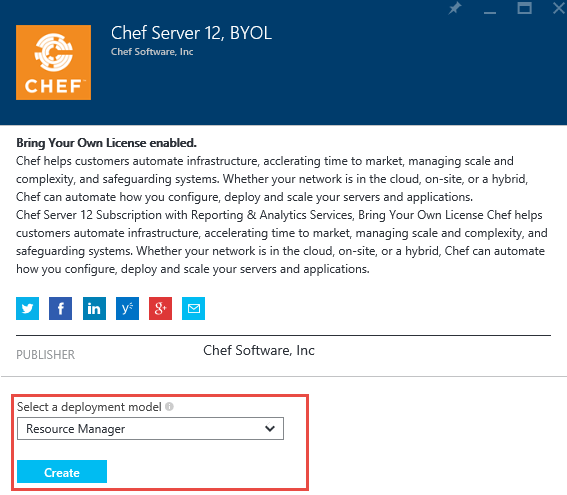
Choose Resource Manager as the deployment model and click Create
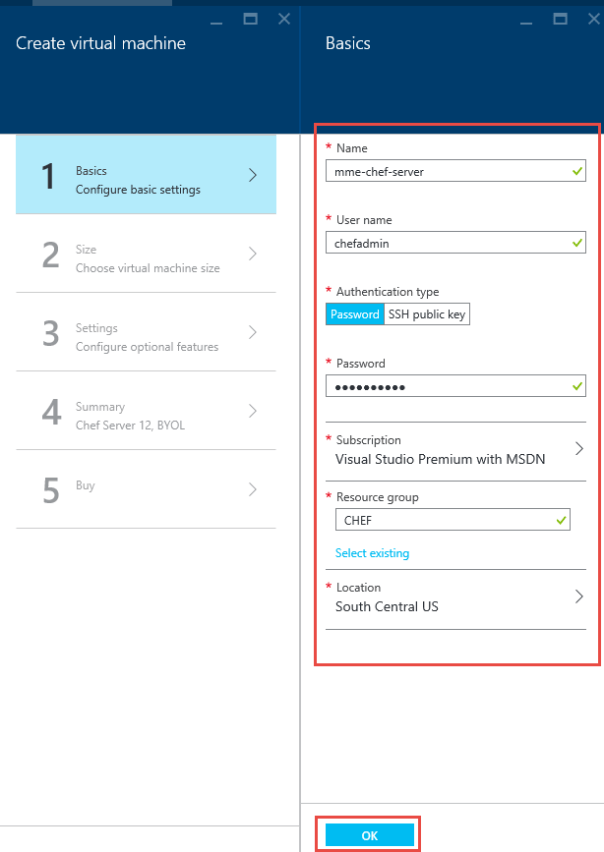
Provide basic settings and click OK.
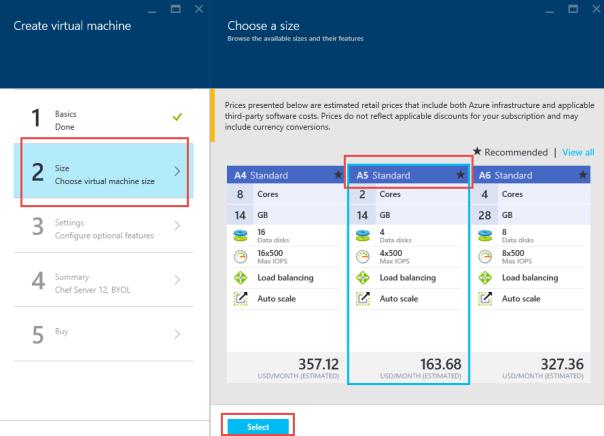
Click Size, then A5 Standard, then Select
Click Settings and then OK. Choose the default options, unless you want to change something.

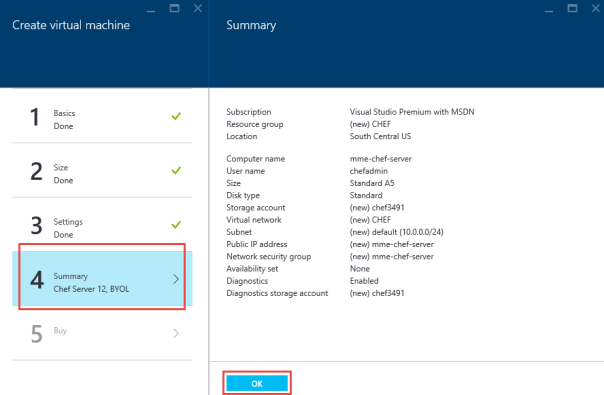
Click Summary, review summary and click OK
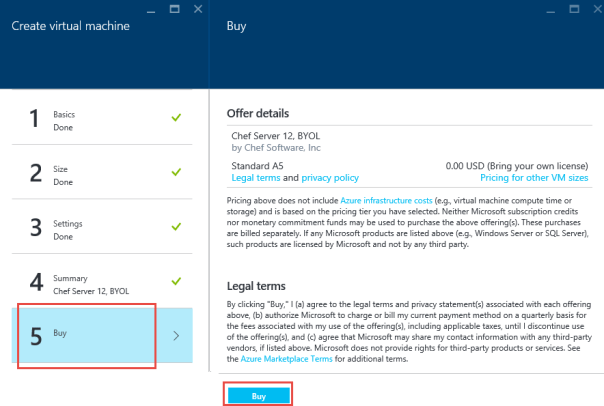
Click Buy on left menu, review offer details and click Buy button
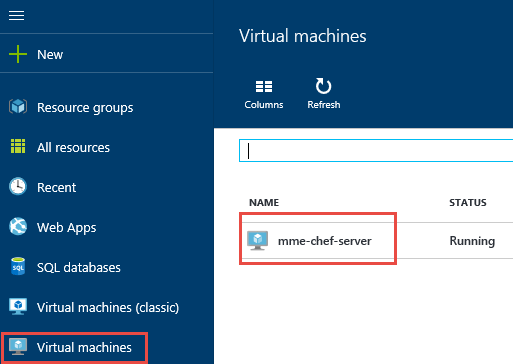
Wait for the newly created server to be in Running state.

Set DNS Name Label for virtual machine
Click Virtual machines, then mme-chef-server
Click on IP Address
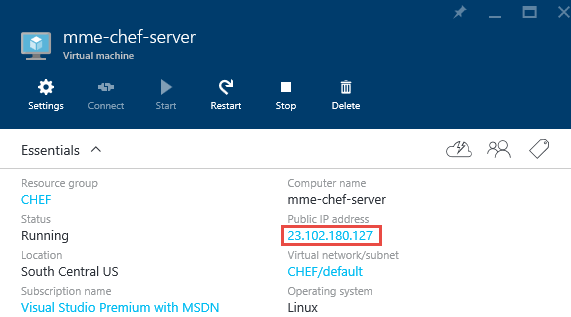
Click on Settings, then Configuration
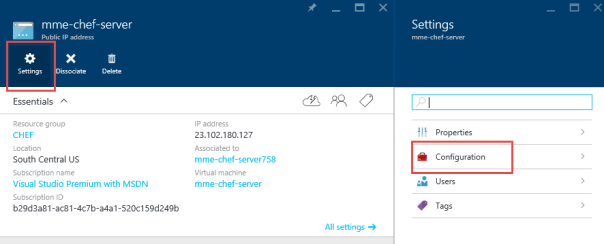
Update DNS name label and click Save
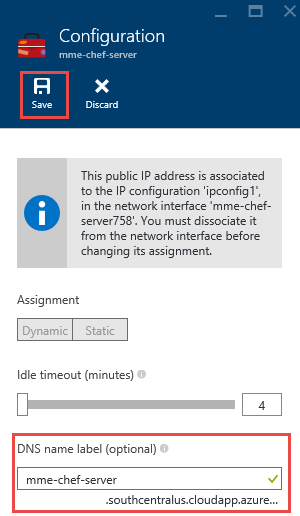
DNS name for the virtual machine in this case is ‘mme-chef-server.southcentralus.cloudapp.azure.com’. Wait for 5 minutes and check if you are able to ssh to the server using ‘ssh chefadmin@mme-chef-server.southcentralus.cloudapp.azure.com‘
Configure Chef Server
Open Git Bash and run the following commands.
| # Here chefadmin is the admin user created during virtual machine creation.
# Provide DNS name label of the virtual machine ssh chefadmin@mme-chef-server.southcentralus.cloudapp.azure.com #sudo chef-setup -u <username> -p <password> -d <fqdn> #Here username is a new user, which will be created in this process. # You will use this username to connect form portal sudo chef-setup -u admin -p Demo@Pass1 –d mme-chef-server.southcentralus.cloudapp.azure.com |
Create Organization
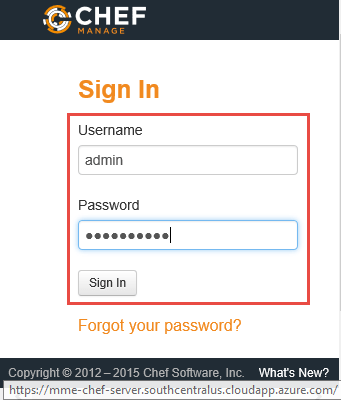
Browse https://mme-chef-server.southcentralus.cloudapp.azure.com
Enter Username (specified during chef-setup), Password (specified during chef-setup) and click Sign In
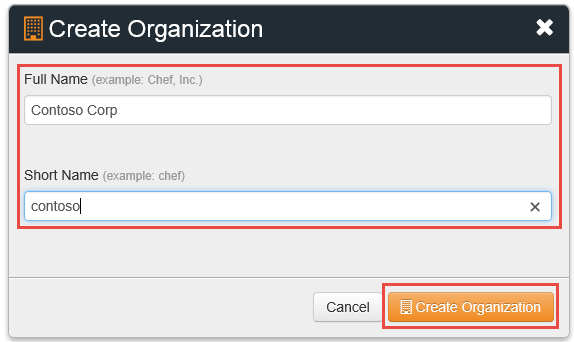
Click Create New Organization
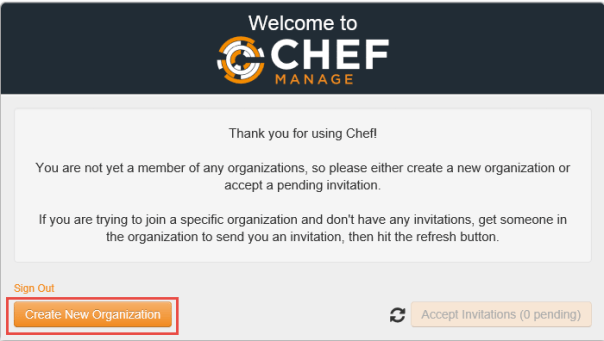
Provide Full Name, Short Name, then click Create Organization
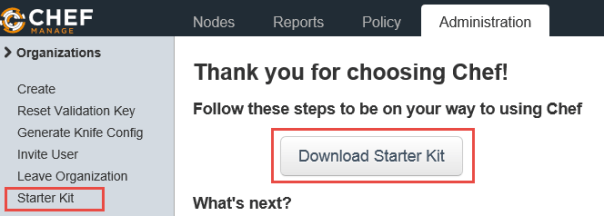
Click on Administration, then Organizations, then contoso

Click Starter Kit, then Download Starter Kit
Click Proceed

Save chef-starter.zip locally. In my machine (Windows Laptop), it saved by default in the Downloads folder.
Establish Connectivity from Workstation
Copy the downloaded chef-starter.zip from local machine to Chef Workstation (I am copying it to workstation, I created as per the first blog in this series). I used the following command to copy the file from Git Bash. You might have to change according to your environment.
| scp Downloads/chef-starter.zip azureuser@mme-chef-ws.cloudapp.net:/home/azureuser |
SSH into workstation
| ssh azureuser@mme-chef-ws.cloudapp.net |
Execute following commands to get SSL keys and test connection to Chef Server
| # move to home directory of azureuser
cd # install unzip utility sudo apt-get install unzip # unzip the starter kit unzip chef-starter.zip # move to chef-repo directory cd chef-repo # retrieve SSL keys from server knife ssl fetch # test connection to server, we should see contoso-validator knife client list |
Next Blog
Next, I will try out adding a Chef Node to the organization and running cookbooks.
Setup Chef Workstation on Microsoft Azure
If you do not know how Chef helps with DevOps, I recommend you to watch this conversion https://channel9.msdn.com/events/Seth-on-the-Road/That-Conference-2015/T009, between Matt Stratton, Senior Solutions Architect at Chef and Seth Juarez, Senior Technical Evangelist on the Channel 9 team.
There are lots of tutorials and learning guides available for Chef (https://learn.chef.io/). For all my learnings, I completely depend on virtual machines on cloud, unless there is a specific need or limitation to use an on-premise VM. So when I was going through the Chef tutorials, I had to accommodate some changes based on Azure environment. I am documenting my experiments with Chef on Azure in this series of blog posts.
Prerequisites
- Microsoft Azure Subscription
- Git Bash Shell
Create a Virtual Machine for Chef Workstation
Navigate to https://manage.windowsazure.com/ on browser

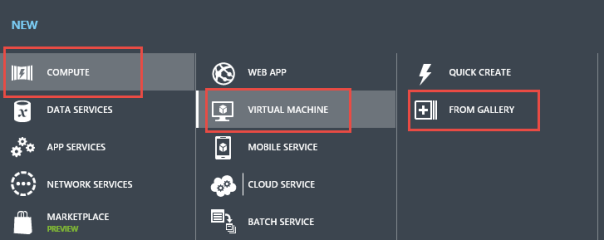
Click on the +NEW link at the bottom-left corner of the screen.

Click COMPUTE, then VIRTUAL
MACHINE, then FROM GALLERY
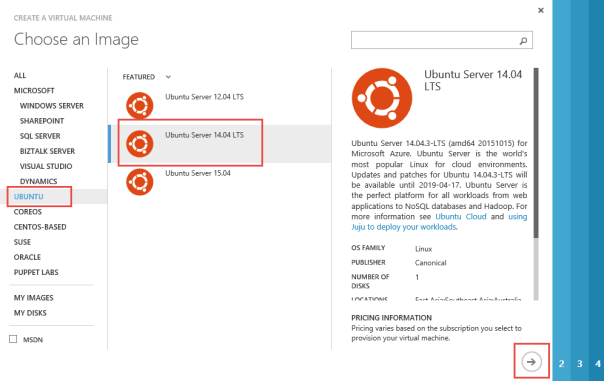
Click UBUNTU, then Ubuntu Server 14.04 LTS, then next arrow
Specify virtual machine configuration and click next. Note that I have used ‘mme-chef-ws’ as the name of virtual machine for Chef Workstation. This name will be used in later steps. Change it according to your environment. Also, for simplicity, I have chosen password option instead of SSH key for the VM.

Change virtual machine configuration if required. Add HTTP endpoint to the endpoints (we enable web server as part of chef learning later), and click next

Click OK

Wait for the created virtual machine to be in running state.

Install Chef Development Kit
The Chef Development Kit (ChefDK) brings the best-of-breed development tools built by the awesome Chef community. Actual download site is https://downloads.chef.io/chef-dk/. However, I have followed steps in another tutorial provided by Chef.
Open Git Bash on your computer and connect to the Chef workstation. Note down the DNS name of virtual machine from the virtual machine details (above picture). Connect to the virtual machine by running the command ‘ssh azureuser@vmname.cloudapp.net’

Run the command (curl -L http://www.getchef.com/chef/install.sh | sudo bash) to install chef client and tools on workstation.

Learn Chef Basics on Ubuntu
Now the workstation is ready for us to learn the basics of Chef. Now we can follow the tutorial provided on Chef learning site on this virtual machine.
- Configure a resource – https://learn.chef.io/learn-the-basics/ubuntu/configure-a-resource/
- Configure a package and service – https://learn.chef.io/learn-the-basics/ubuntu/configure-a-package-and-service/
- Making recipe more manageable – https://learn.chef.io/learn-the-basics/ubuntu/make-your-recipe-more-manageable/
Next Blog
Next, I will try out configuring Chef Server and node on Azure.
