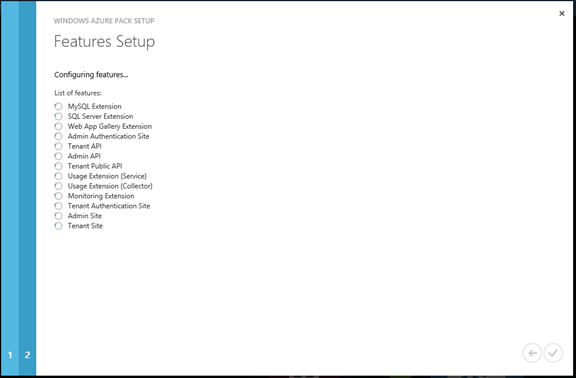
Monthly Archives: February 2015
Configure new SSH authorization key for Linux on Azure
If you would like to use SSH with Linux virtual machines on Azure, there is a great documentation here. One question I have seen in the forum, which is not clearly explained in the documentation is, how do we add a new SSH authorization key, if we missed adding the SSH file, during the creation of virtual machine.
Giving the steps I have followed to setup a new SSH authorization key below:
Step 1: I created a Linux VM (Ubuntu 14) on Azure using quick create VM (linuxvmforssh.cloudapp.net).
Step 2: Executed following commands from Git shell on my Windows 8.1 laptop
GIT> ssh-keygen -t rsa -b 2048 -v -f azurecert.key

GIT> scp azurecert.key.pub azureuser@linuxvmforssh.cloudapp.net:/home/azureuser

GIT> ssh azureuser@linuxvmforssh.cloudapp.net

azureuser@linuxvmforssh:~$ cat azurecert.key.pub >> .ssh/authorized_keys

azureuser@linuxvmforssh:~$ sudo service ssh restart

azureuser@linuxvmforssh:~$ exit

GIT> ssh -i azurecert.key azureuser@linuxvmforssh.cloudapp.net
Hope this helps you to setup new SSH authorized keys for your Linux virtual machines.
Resource Governor at Work with Azure Pack
WAP administrators can use the functionality of SQL Server 2014 Resource Governor with UR5 of Windows Azure Pack. You can read about ‘Manage tenant database workloads with resource governor in WAPack’ here. In this blog post I am detailing the last section ‘Resource Governor at Work’ of the above blog post.
Tools available to generate load on SQL server
Though we can write custom tools (C#, PowerShell) etc. to create test databases and generate load, sometimes publically available tools will come handy. Providing two tools that I have come across.
- Hammer DB (I have used this for various load generation, benchmark verification before/after changing server configuration etc.)
- SQL Load Generator
View CPU Usage for Resource Pools
In this post, I assume that you have followed the instructions provided in the above blog post. In my configuration, I have created the suggested resource pools and created a database named ‘contoso’. I am providing the steps to identify the resource pool name and how to view the performance counters for the resource pool.
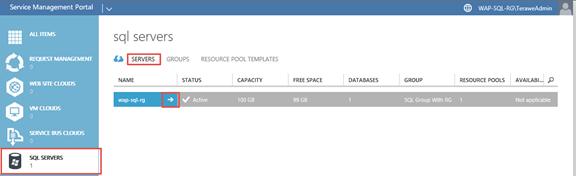
Step 1: Identify the resource pool associated with the database
As a service provider administrator, navigate to ‘servers‘ tab in ‘SQL Servers‘ resource provider and navigate to the details of specific server.
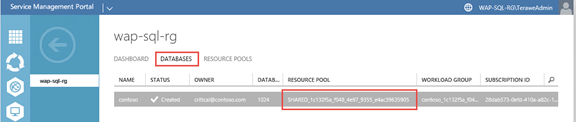
Navigate to the ‘databases‘ tab and find out the ‘resource pool name’.
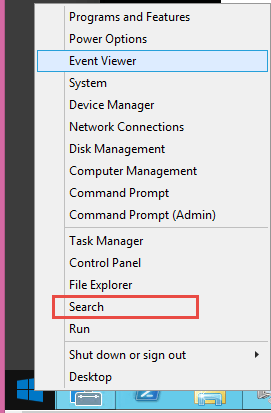
Step 2: Open performance monitor
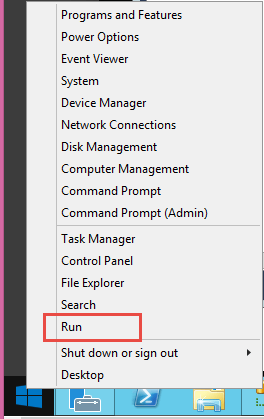
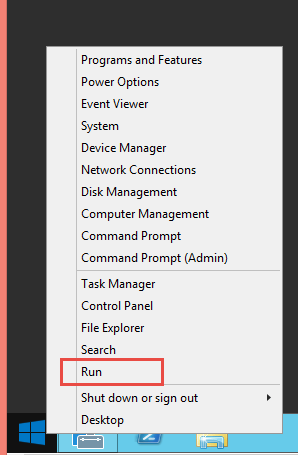
You can do this by running ‘perfmon’ on windows run prompt.
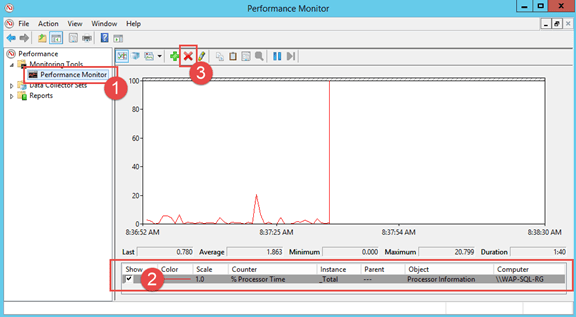
- Navigate to the performance monitor view
- Select any existing counters
- Click on ‘Delete’ to remove the existing counters
- Click on ‘+’ button next to add new counters (in the following step)
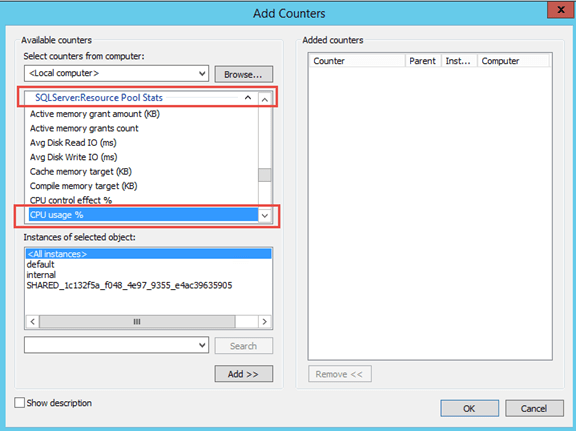
Step 3: Add SQL Resource Governor Performance Counter
-
Choose counter ‘CPU usage %‘ in ‘SQL Server: Resource Pool Stats‘
Note: You can see that all the resource pools you saw along with databases tab in windows azure pack + two system resource pool instances (default & internal) are listed in the instances section
- Now you can select all instances and click on ‘Add‘ button.
Step 4: Generate load against the databases and watch usage in performance monitor
Windows Azure Pack – Dedicated SQL offering (Part 3)
Part 1: In the part one of this series, we have gone through the step by step instructions of installing and configuring Windows Azure Pack portal and api express on an Azure virtual machine. You can read through the part one of this series here.
Part 2: In the part two of this series, we have gone through the step by step instruction of creating group and server in SQL server resource provider, followed by creating plan and add-on based for providing a dedicated offer. Also, we created a tenant account. You can read through the part two here.
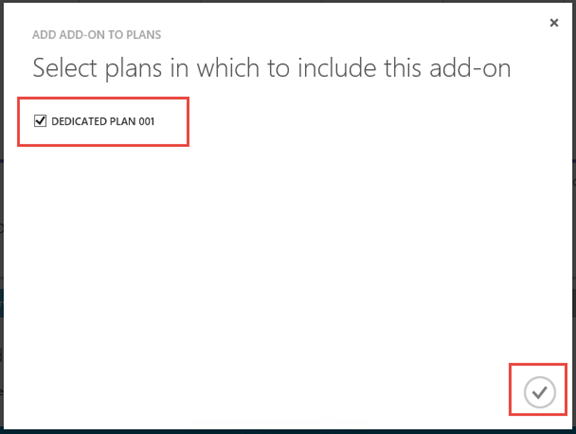
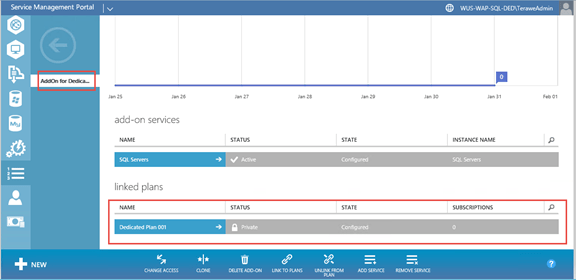
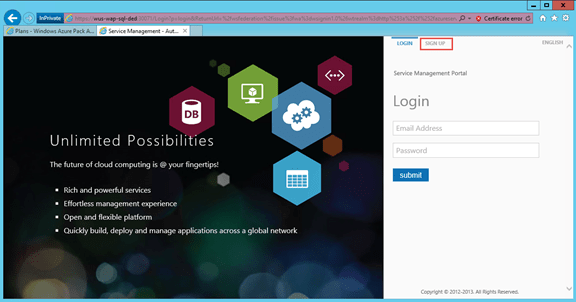
In this post, I am providing the PowerShell script that can be used to assign the private plan and add-on to the tenant. It is possible to assign private plan to tenant from admin portal. However assigning a private add-on to tenant is not enabled from admin portal. So we need to leverage PowerShell script to assign the plan and add-on to tenant.
Step 7: Assign private plan and add-on to tenant by service provider admin
# Assign all variable values specific to your environment
$windowsAuthSiteUri = "https://localhost:30072"
$adminUri  = "https://localhost:30004"
$planName  = "Dedicated Plan 001"
$addonName = "AddOn for Dedicated Plan 001"
$userName  = "admin@tenant.com"

#
# Get Token
$token = Get-MgmtSvcToken `
	-Type Windows `
	-AuthenticationSite $windowsAuthSiteUri `
	-DisableCertificateValidation `
	-ClientRealm "http://azureservices/AdminSite"

#
# Get plan, add-on and user objects
$plan = Get-MgmtSvcPlan `
	-AdminUri $adminUri `
	-Token $Token `
	-DisableCertificateValidation `
	-DisplayName $planName

$addon = Get-MgmtSvcAddOn `
	-AdminUri $adminUri `
	-Token $Token `
	-DisableCertificateValidation `
	-DisplayName $addonName

# Create a new subscription for the user against the dedicated plan
$subscription = Add-MgmtSvcSubscription `
	-AdminUri $adminUri `
	-Token $token `
	-AccountAdminLiveEmailId $userName `
	-AccountAdminLivePuid $userName `
	-PlanId $plan.Id `
	-FriendlyName $planName `
	-DisableCertificateValidation
In the last part of this series, I will walk through the tenant experience of creating databases leveraging the dedicated plan/add-on.
Windows Azure Pack – Dedicated SQL offering (Part 2)
In the part one of this series, we have gone through the step by step instructions of installing and configuring Windows Azure Pack portal and api express on an Azure virtual machine. You can read through the part one of this series here.
In this post, we will go through creating plan and add-on that will enable us to assign a single server to a single subscription. This is the high level approach.
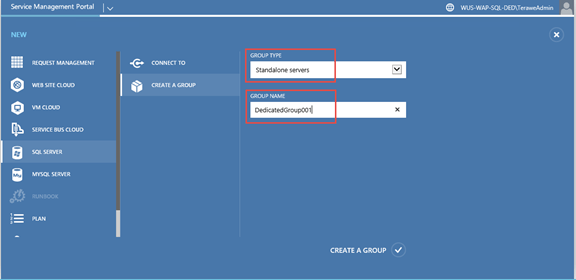
- Add a new group for the dedicated server. Only this dedicated server will be available in this group.
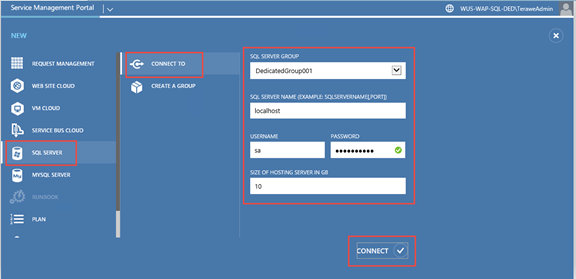
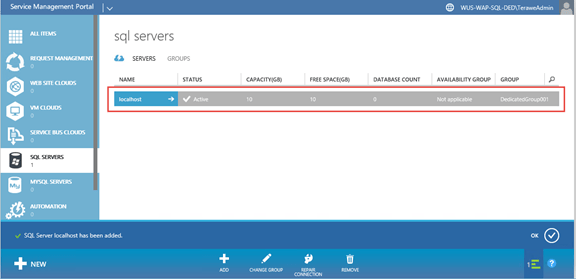
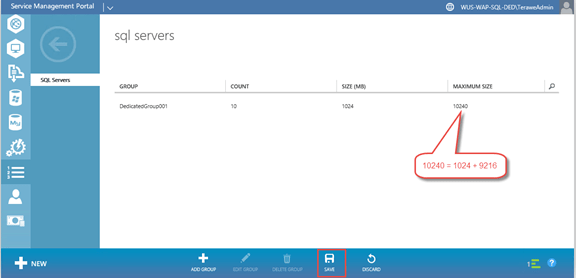
- Add a new SQL server and assign it to the group we created above. Let us assume that this server can support up-to 10GB of data files. And we want to provide 1GB as the minimum database size. With this configuration, tenant can create one 10GB database or ten 1GB databases. Tenant can create a database and can increase the size of database, based on remaining space available on the server (made available through add-on).
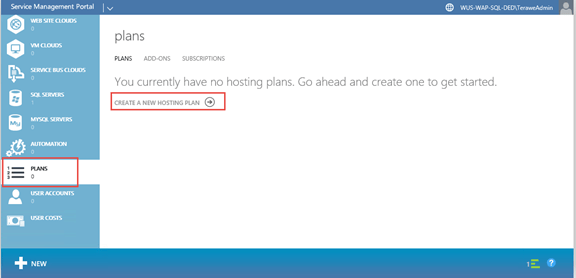
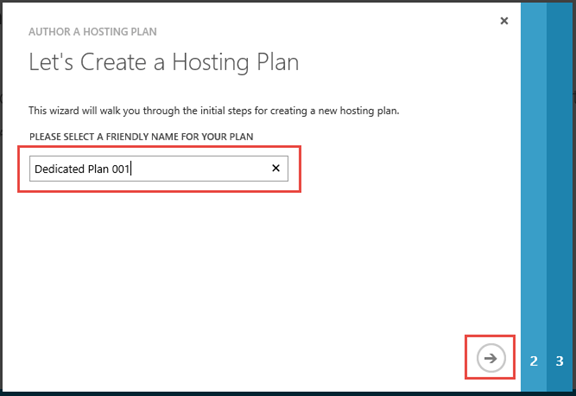
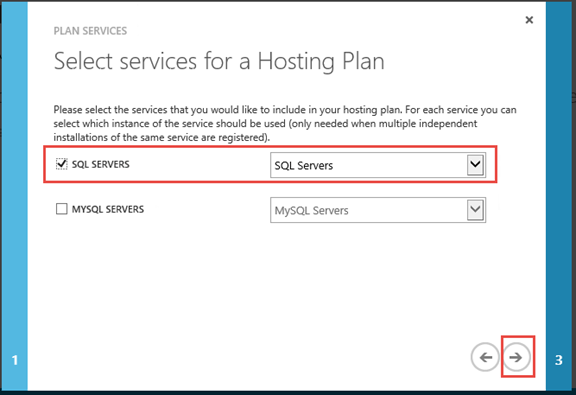
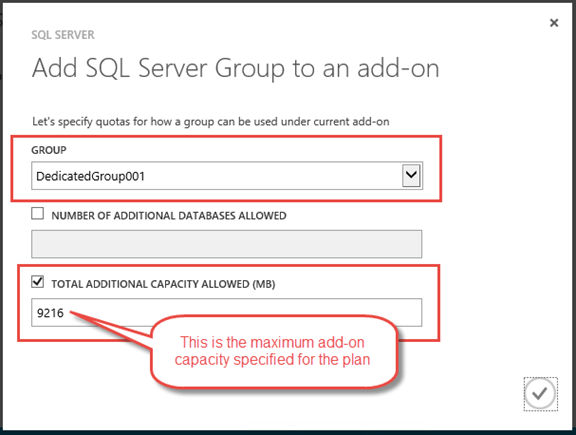
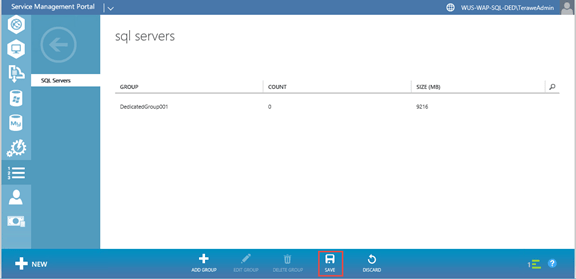
- Now create a new plan. During plan quota configuration, add the group created about. Also, keep the base size as 1GB and allow add-on size of up-to 9GB.
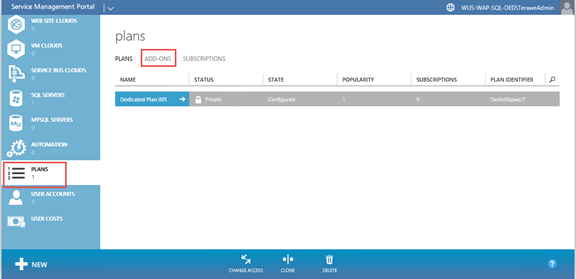
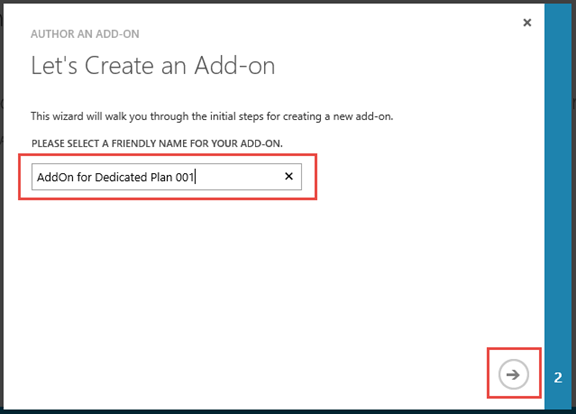
- Create a new add-on and allow tenants to extend capacity by up-to 9GB. Link this plan & add-on.
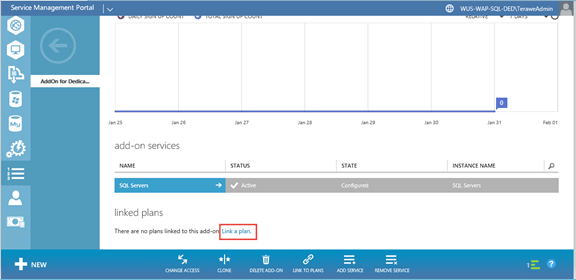
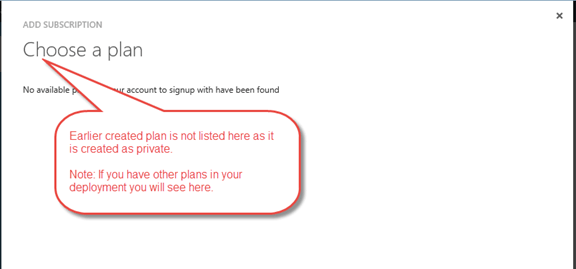
- Remember, plan and add-on are kept private, so that users can’t sign up for this plan. In the next blog post, I will walk through how to assign the plan & add-on to the user (even though it is private).
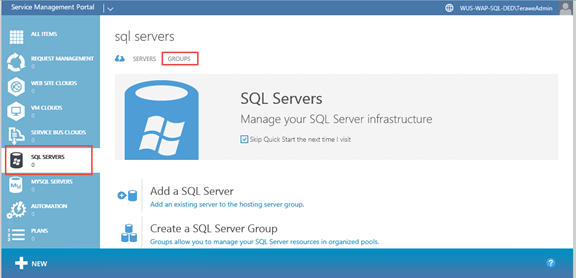
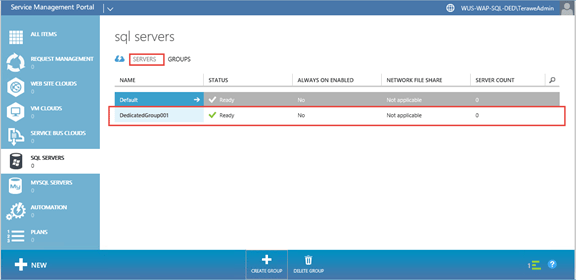
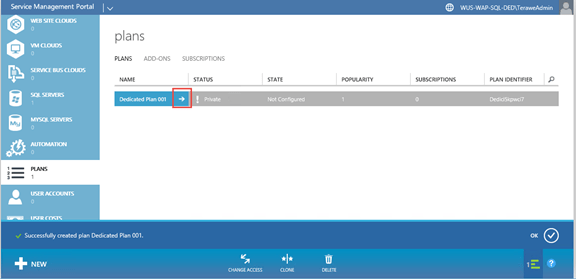
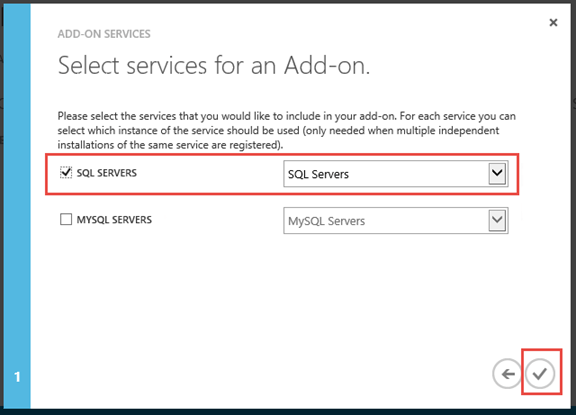
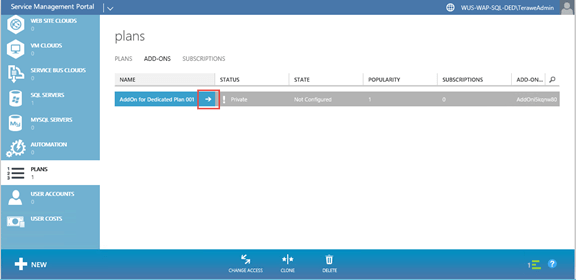
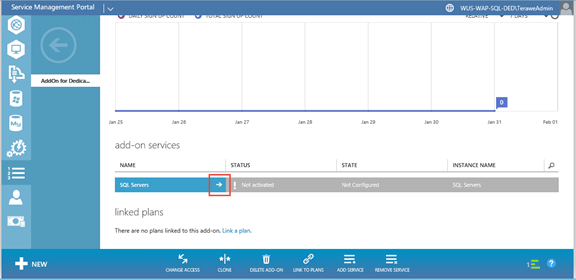
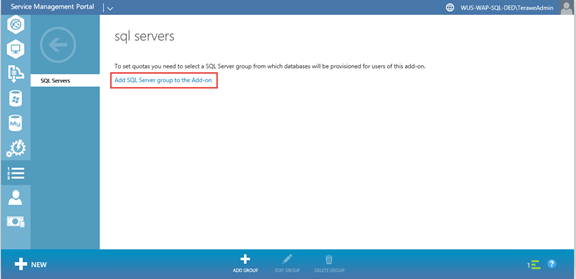
Step 5: Create Group, Server, Plan and Add-On


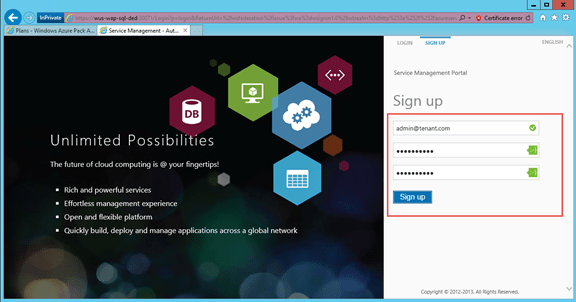
Step 6: Create a new tenant (for test purpose)

You can read through the third part in this series here. This part has the PowerShell script that can be used to assign the private plan and add-on to the tenant.
Windows Azure Pack – Dedicated SQL offering (Part 1)
Windows Azure Pack comes with SQL resource provider, which enables service providers to offer shared database services for both standalone (no HA) and highly available databases. This blog is the first in the series where I explain step-by step on how a dedicated SQL offer (this means that a single database server is reserved for a single subscription) leveraging the plans / add-on features. Each instruction / step is shown with the corresponding screen capture. Texts are provided with the screen capture, only if something needs to be called out specifically.
Like always, while testing this out, I have used a virtual machine from Azure. If you are trying this on an on-premise machine, skip the steps accordingly.
This blog covers the first four steps
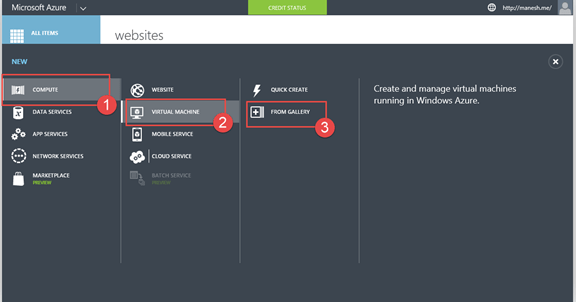
- Create and remote into SQL 2014 virtual machine on Azure
- Install Windows Server Roles & Features
- Enable SQL Authentication and Reset ‘sa’ password
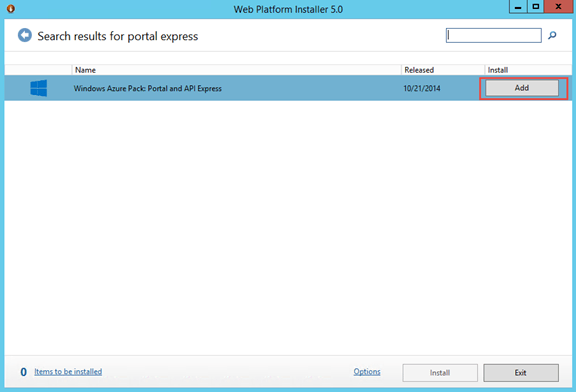
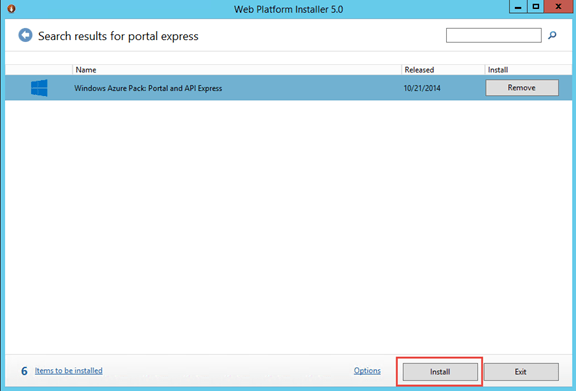
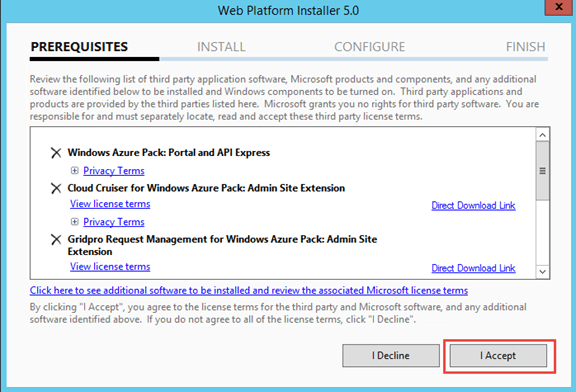
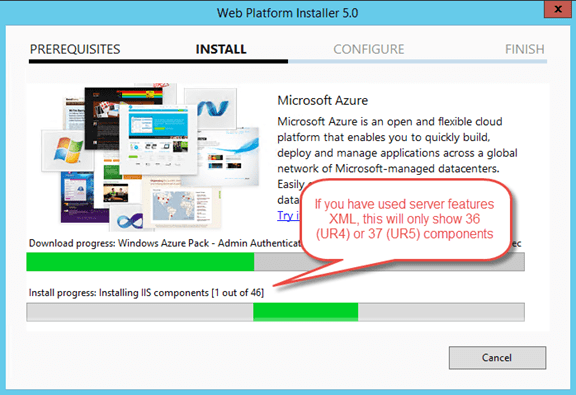
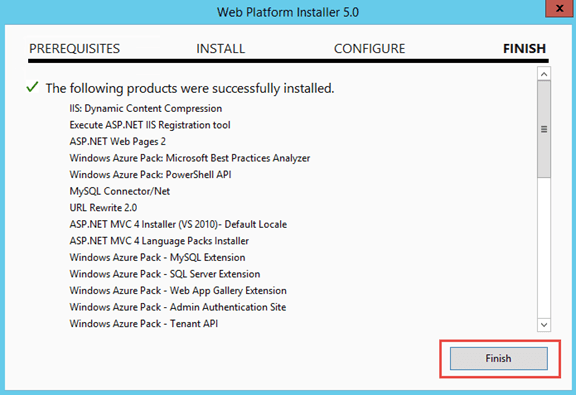
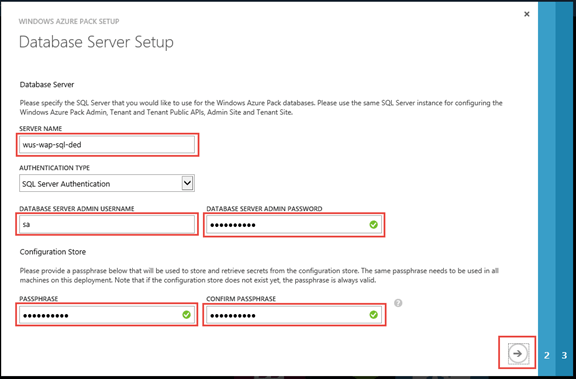
- Install and Configure Windows Azure Pack Portal Express
You can continue reading the second part of this series here.
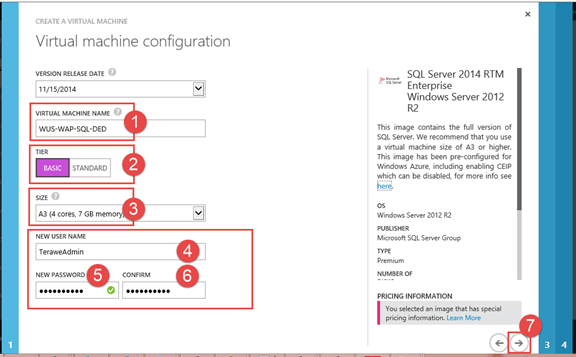
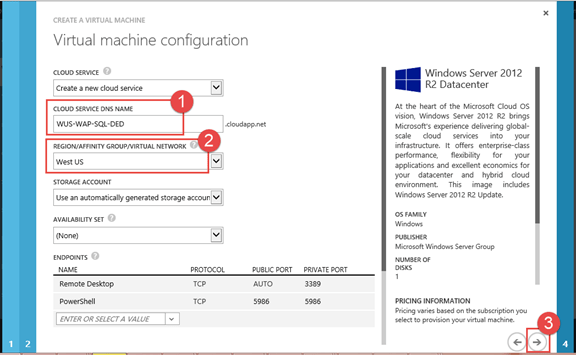
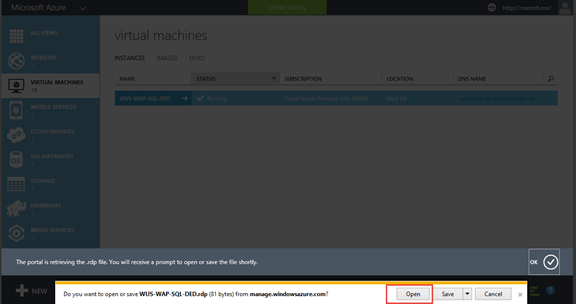
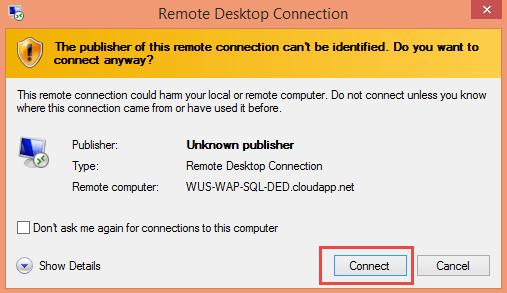
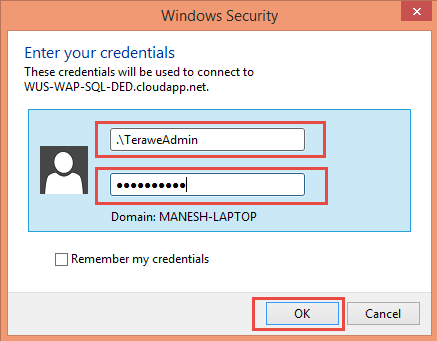
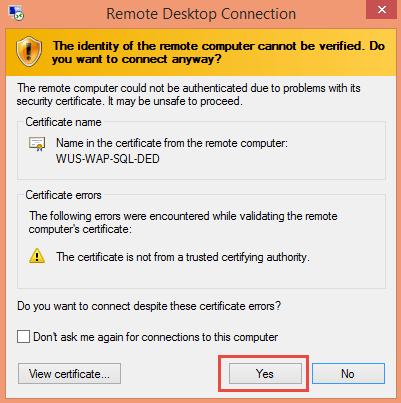
Step 1: Create and remote into SQL 2014 virtual machine on Azure


Step 2: Install Windows Server Roles & Features
Enable the required roles and features for Windows Azure Pack. I have created another blog on how to easily do this using PowerShell. You can follow the steps from here. Note that this step is optional. If you do not do this, Windows Azure Pack Portal Express deployment will do it for you.
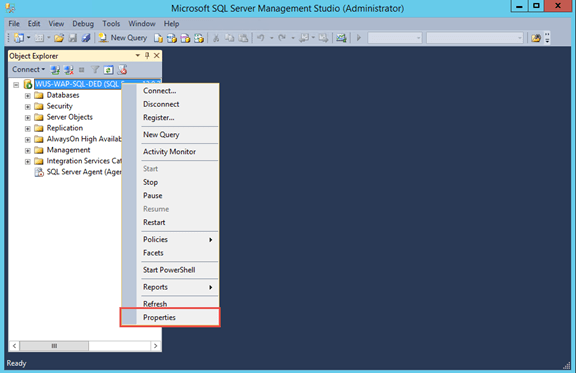
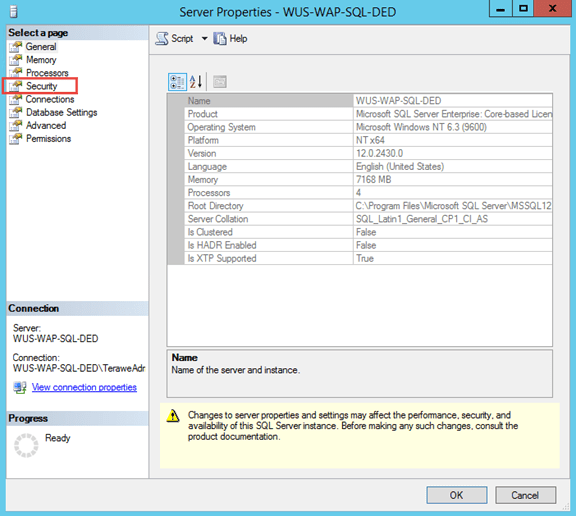
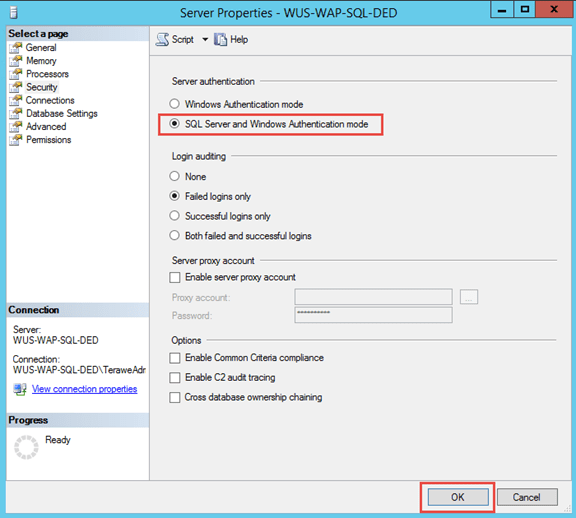
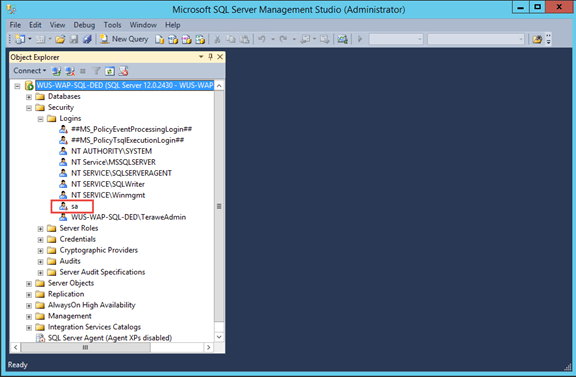
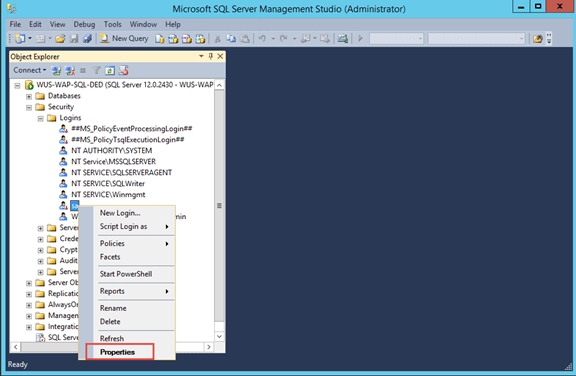
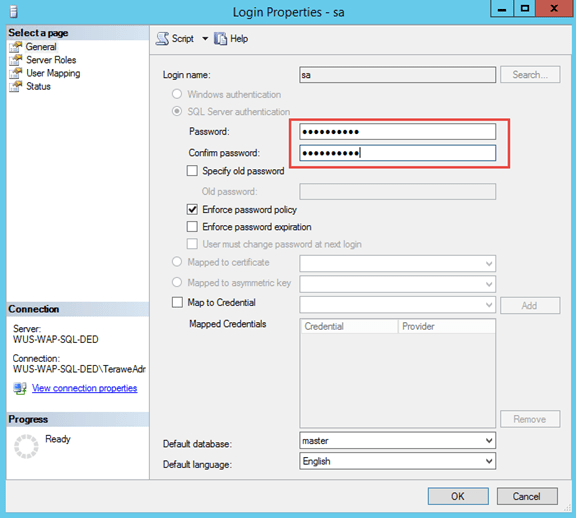
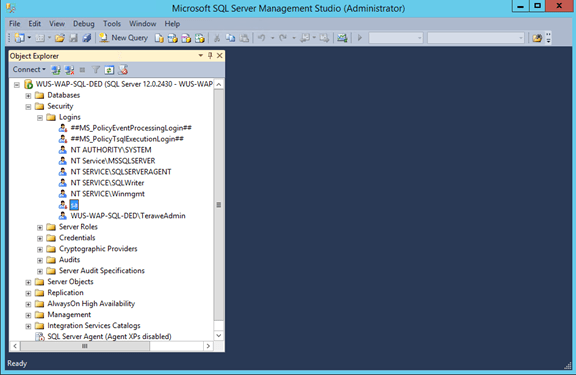
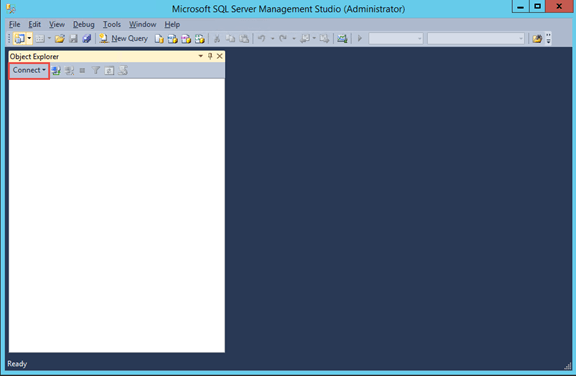
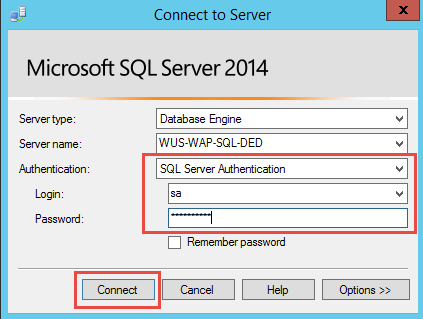
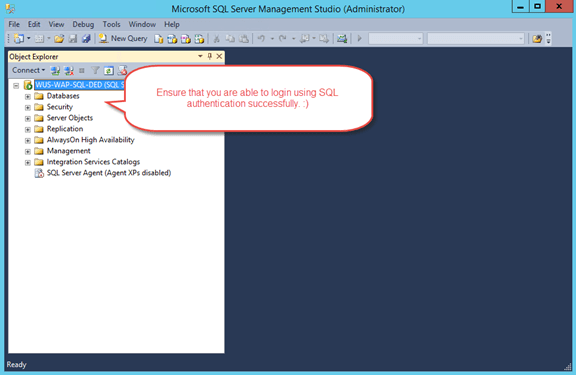
Step 3: Enable SQL Authentication and Reset ‘sa’ password
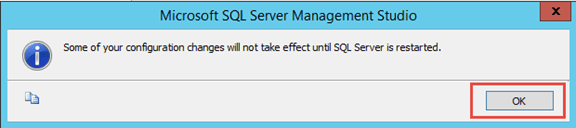
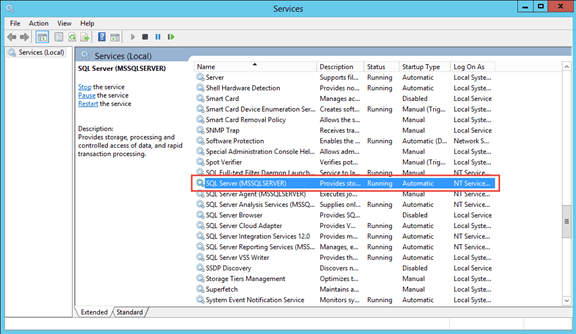
By default, SQL virtual machines on Azure come with Windows Authentication. You need to explicitly enable SQL authentication. Note that you need to restart SQL Server service, after enabling SQL authentication.


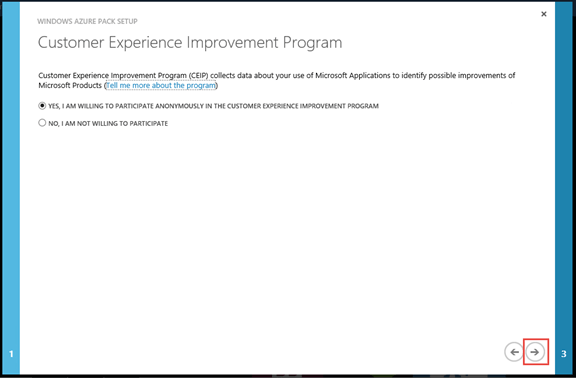
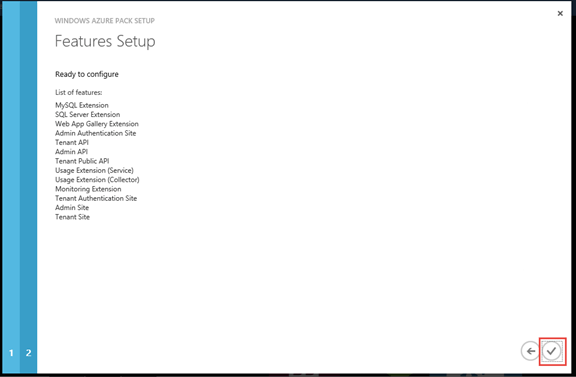
Step 4: Install and Configure Windows Azure Pack Portal Express


You can continue reading the second part of this series here.
Azure SQL Virtual Machine for Development and Testing
Though Microsoft Azure provides virtual machine images with SQL server installed, during development and testing, I may not need those optimizations. All I might need is a virtual machine with database engine installed. Also, from a cost standpoint, using an evaluation version of SQL server on a virtual machine might be preferred over a SQL VM image, for development and testing purposes. Providing how I prepare my SQL experiment virtual machine (most of the time, I use the machine for a week or two and once the experiment is complete, I delete the virtual machine).
Azure Virtual Machine Images with SQL

Build a Virtual Machine with SQL Database Engine
Step 1: Create a new ‘Windows Server 2012 R2 Datacenter’ virtual machine with required configuration. Once virtual machine is up and running continue with next steps.
Step 2: SQL Server requires .NET 3.5 to be installed on server. This is not installed by default on Azure virtual machines.
Install-WindowsFeature -Name NET-Framework-Core
Install-WindowsFeature -Name PowerShell-V2
Step 3: Download SQL server installer from an Azure storage account. You should run the following commands from Microsoft Azure PowerShell window.
CD C:\

$context = New-AzureStorageContext `
                -StorageAccountName '<todo>' `
                -StorageAccountKey '<todo>'

Get-AzureStorageBlobContent -Container '<todo>' `
                            -Context $context `
                            -Blob 'SQLServer2014-x64-ENU.iso'
Step 4: Mount downloaded ISO image to a drive
$sqlIso = "C:\SQLServer2014-x64-ENU.iso"

$sqlDrive = (Mount-DiskImage -ImagePath $sqlIso `
                            -PassThru `
                            -WarningAction Ignore |
                            Get-Volume).DriveLetter + ":"
Step 5: Silently install SQL Server from command line. For more details around command line based install check product documentation.
$domainName = Get-Content env:USERDOMAIN
$userName   = Get-Content env:USERNAME
$adminUser  = $domainName + "\" + $userName
$saPassword = "Secret@2015"

$installCommand = "$sqlDrive\Setup.exe /Q /IACCEPTSQLSERVERLICENSETERMS /ACTION=install /UpdateEnabled=0 /FEATURES=SQLENGINE,CONN,SSMS,ADV_SSMS /INSTANCENAME=MSSQLSERVER /SECURITYMODE=SQL /SAPWD=$saPassword /SQLSVCACCOUNT='NT Service\MSSQLSERVER' /SQLSYSADMINACCOUNTS=$adminUser"

Invoke-Expression $installCommand
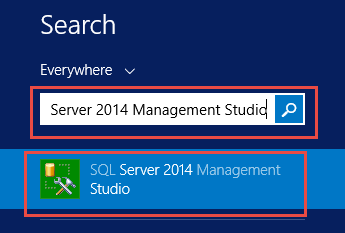
Step 6: Once installation is complete, open SQL Management Studio and test with both Windows as well as SQL authentication.
Upload SQL installer to Storage
You can use the following script to upload SQL installer to blob storage for future use.
$context = New-AzureStorageContext `
                -StorageAccountName '<todo>' `
                -StorageAccountKey '<todo>'

Set-AzureStorageBlobContent `
			-Blob "SQLServer2014-x64-ENU.iso" `
			-Container '<todo>' `
			-File "SQLServer2014-x64-ENU.iso" `
			-Context $context `
			-Force
Cleaning up Azure Storage Accounts
I wanted to put some structure around the experiments that I was doing on Microsoft Azure. I noticed that I had lots and lots of storage accounts created in the past. I used to create new virtual machines from UI and shut it down whenever I am done with the required purposes. Whenever it shows me that I ran out of quota on cores or cloud services, I used to delete the virtual machine and cloud services. However, since most of the time, I used the option to create a new storage account as part of virtual machine creation, there were lot of storage accounts left out.
How do I go about finding which ones are still used vs. which ones are not in use. I can go through the portal click through each of the storage accounts, go to containers tab and look if there are files inside containers. But I thought it will be fun to write a PowerShell script that can traverse all storage accounts, containers and list the files and their sizes. If I see a storage account with no files, or storage account with only a ‘vhd’ container with couple of .status files only, then they are good to be delete.
Script Downloads
Getting started with Microsoft Azure PowerShell
I will be writing a series of blogs around Microsoft Azure & Hybrid Cloud. As a quick start, wanted to write up on how to setup our machines with PowerShell to work with Microsoft Azure.
Setup machine with Microsoft Azure PowerShell
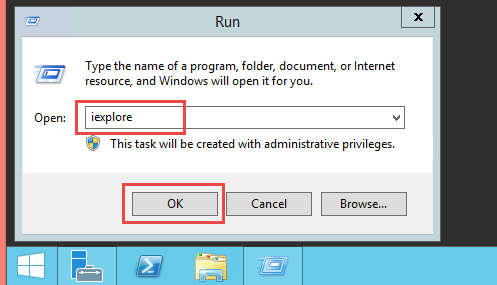
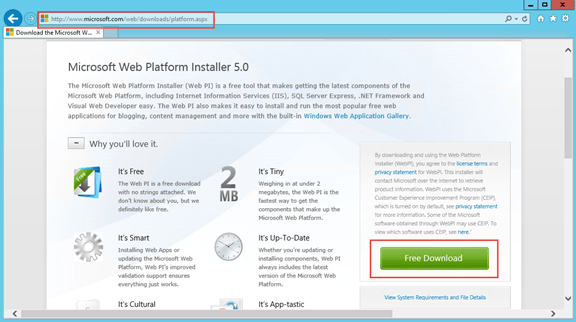
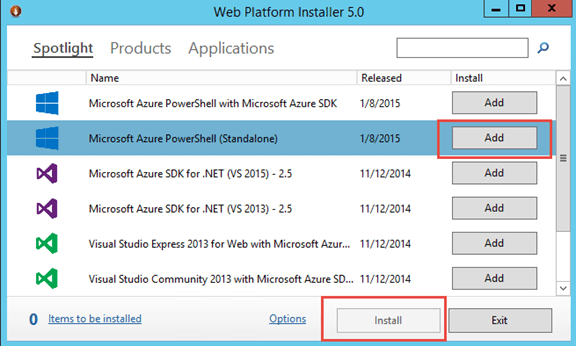
- If you haven’t installed Web Platform Installer, you can download and install it from http://www.microsoft.com/web/downloads/platform.aspx
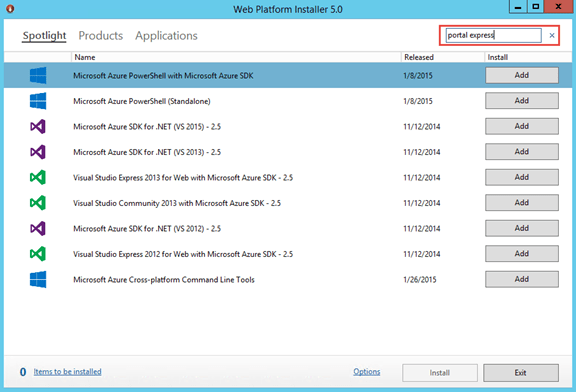
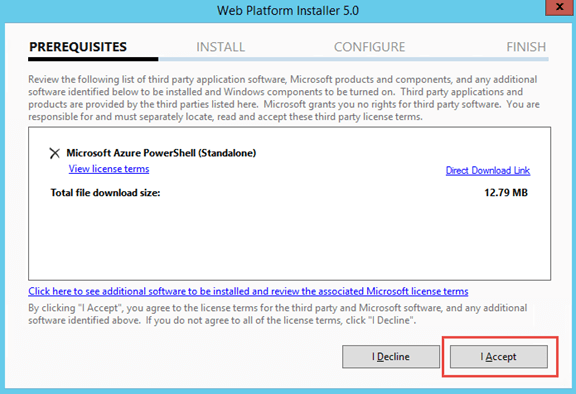
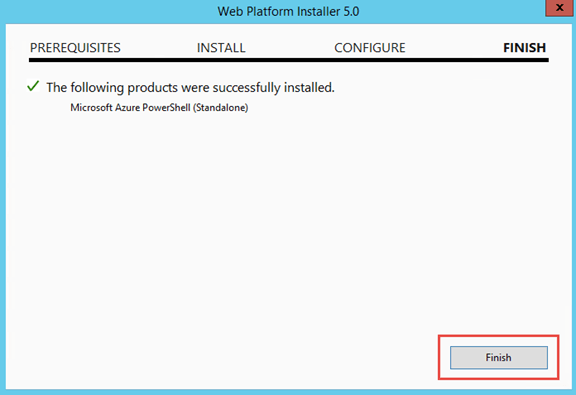
- Download and install ‘Microsoft Azure PowerShell’ from Web Platform Installer. If you do not find that in ‘Spotlight’ you can perform a search for ‘Microsoft Azure PowerShell’
Set your default subscription and storage account
Download Azure Publish Settings file , configure default subscription and configure default storage account. There is a very good blog article from Michael Walsham explaining this step-by-step. I strongly recommend you read through that post. There is one minor change in Azure PowerShell cmdlet usage (based on a cmdlet update from Microsoft), from the post you see in the blog. I have written a PowerShell script with minor updates, which you can download from here.
Script Downloads
https://gist.github.com/Manesh-R/9ba344e08ebf7e6743a9
This file contains hidden or bidirectional Unicode text that may be interpreted or compiled differently than what appears below. To review, open the file in an editor that reveals hidden Unicode characters.
Learn more about bidirectional Unicode characters
| # Ref: https://manesh.me/2015/02/05/getting-started-with-microsoft-azure-powershell/ | |
| # Step 0: Define all variable values | |
| $publishSettingsFile = "C:\Users\Manesh\Documents\AzureSubscriptions.publishsettings"; | |
| $location = "West US"; | |
| $subscriptionName = "Visual Studio Premium with MSDN"; | |
| # Sometimes, you might have multiple MSDN subscriptions | |
| # If someone else add you as a co-admin on their MSDN subscription etc. | |
| # If so, choose the subscription Id option | |
| $subscriptionId = $null; | |
| # Sometimes, this account is created by someone else. | |
| # So if the script fails, you might want to change this. | |
| $storageAccountName = "manesh"; | |
| # Step 1: Import Azure Publish Settings File | |
| Import-AzurePublishSettingsFile $publishSettingsFile | |
| # Step 2: Set current subscription | |
| Get-AzureSubscription | |
| if ($subscriptionId -eq $null) { | |
| Select-AzureSubscription -SubscriptionName $subscriptionName -Current | |
| } else { | |
| Select-AzureSubscription -SubscriptionId $subscriptionId -Current | |
| } | |
| # Display only current subscription | |
| Get-AzureSubscription -Current | |
| # Step 3: Set current storage account | |
| $isStorageGood = $false; | |
| try { | |
| Get-AzureStorageAccount –StorageAccountName $storageAccountName -ErrorAction Stop | Out-Null | |
| if ((Get-AzureStorageAccount –StorageAccountName $storageAccountName).Location -eq $location) { | |
| $isStorageGood = $true; | |
| Write-Host "'$storageAccountName' storage account already exists, skipping creation" | |
| } else { | |
| Write-Host "'$storageAccountName' storage account already exists, but in a different location. Try another storage." | |
| } | |
| } | |
| catch { | |
| if (!(Test-AzureName -Storage $storageAccountName)) { | |
| Write-Host "Creating Storage Account $storageAccountName" | |
| New-AzureStorageAccount -StorageAccountName $storageAccountName -Location $location | |
| $isStorageGood = $true; | |
| } | |
| else { | |
| Write-Host "'$storageAccountName' storage account already exists and is owned by some other subscription. Try a different name." | |
| } | |
| } | |
| if ($isStorageGood) { | |
| if ($subscriptionId -eq $null) { | |
| Set-AzureSubscription -SubscriptionName $subscriptionName -CurrentStorageAccountName $storageAccountName | |
| } else { | |
| Set-AzureSubscription -SubscriptionId $subscriptionId -CurrentStorageAccountName $storageAccountName | |
| } | |
| # You should see the provided subscription and storage account name while executing following command | |
| Get-AzureSubscription -Current | |
| Write-Host "All is well" | |
| } else { | |
| Write-Host "Try a different storage account name and re-run the script" | |
| } |
.
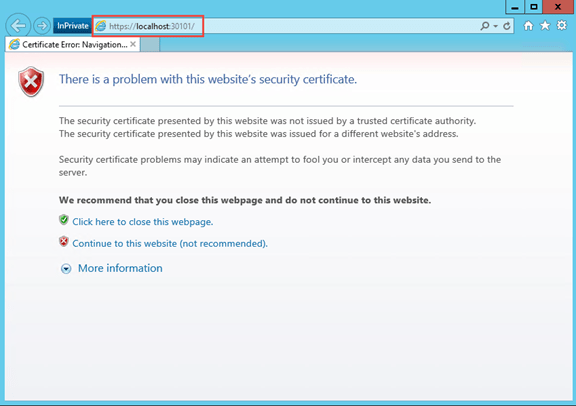
Avoid Certificate Warning on Windows Azure Pack Development Environment
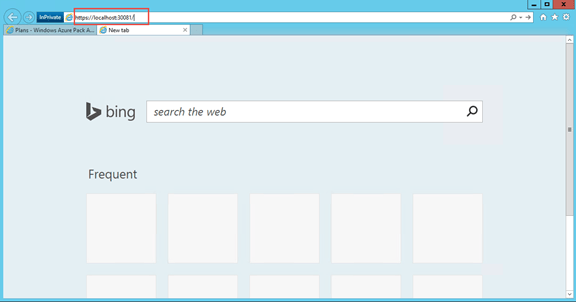
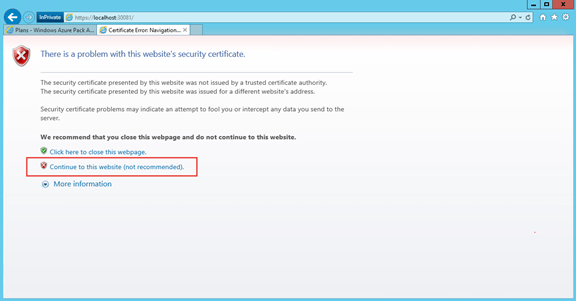
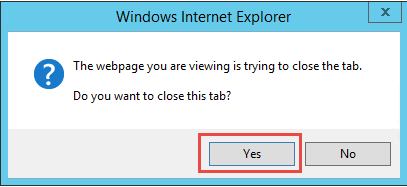
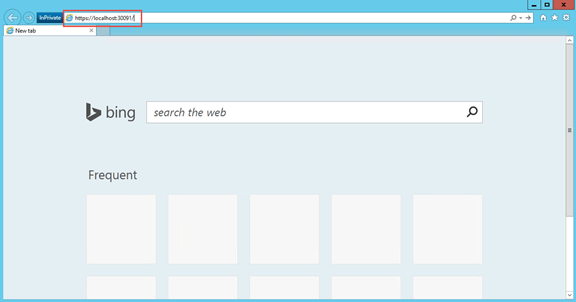
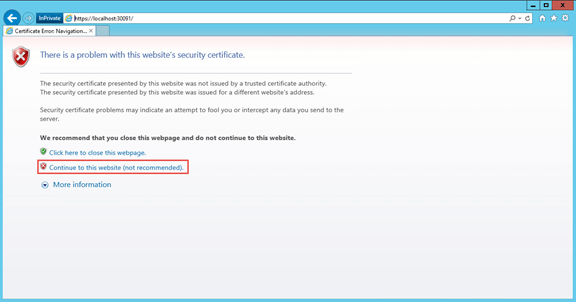
Often, we spin up virtual machines for development & testing purposes of Windows Azure Pack (as part of Team Access Control Resource Provider or other engagements). Typically we develop against an express deployment. One of the very time consuming process during development is to click on ‘continue to this website’ from the certificate validation error message while accessing admin portal & tenant portal. Since the portal automatically redirect to the authentication site, it also prompts for the same, which adds to the pain. 😦
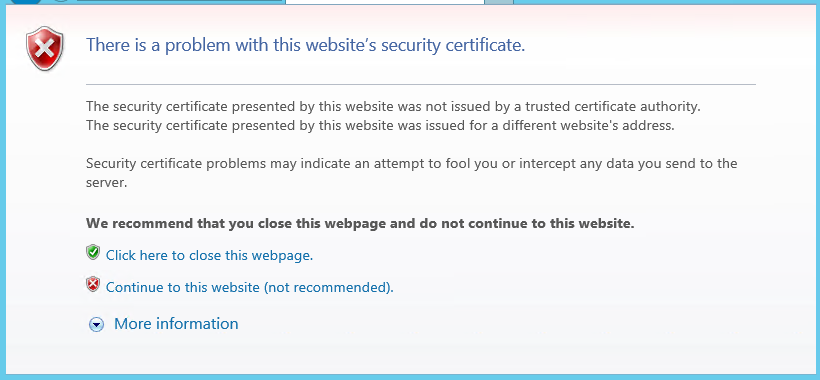
There are two issues with the self-signed certificate.
1. It is not trusted
2. The subject name do not match the website
I am providing how we fix this on our development environment. I suggest this to be only used for development / test environments.
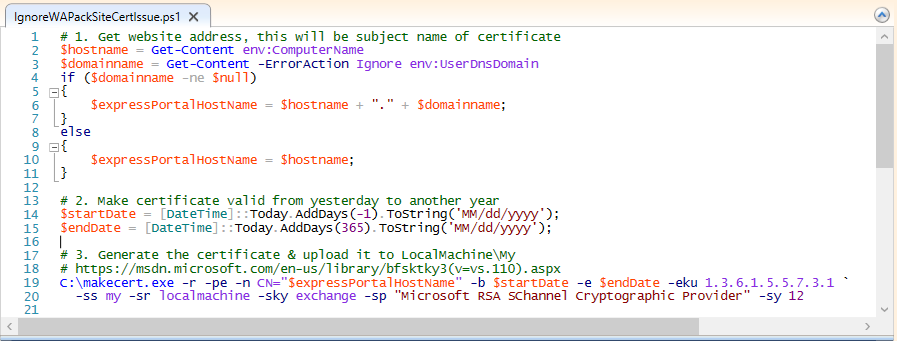
Step 1: Create a self-signed certificate with subject name matching website
Step 2: Add the new certificate as a trusted certificate authority

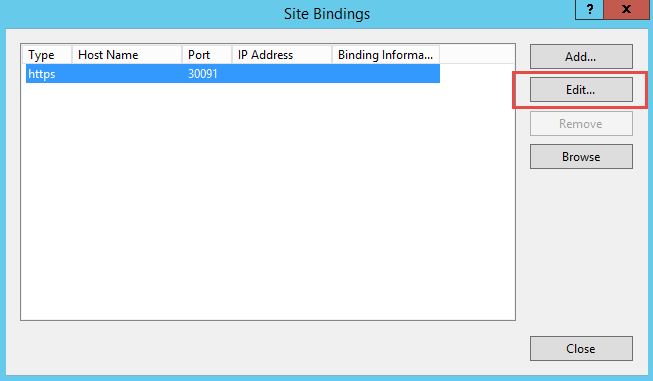
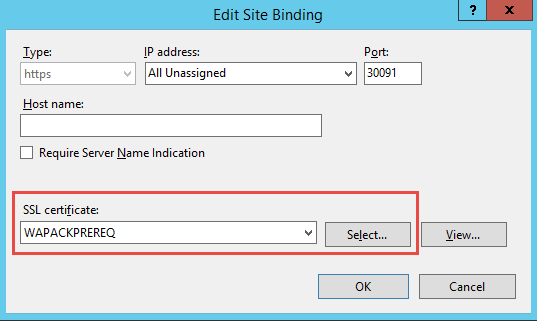
Step 3: Update bindings for sites to use the generated certificate (MgmtSvc-AdminSite, MgmtSvc-AuthSite, MgmtSvc-TenantSite, MgmtSvc-WindowsAuthSite)

Step 4: Restart IIS & Browser
You can download the PowerShell script referred to in this blog post from here. Hope this helps in improving your productivity. 🙂
